To start off, I want to explain what a spreader bar is. A spreader bar is a toy used within BDSM to keep two appendages apart. A spreader bar can be made out of plastic, metal, or in our case today, wood. The purpose of a spreader bar is most commonly for bondage purposes. It may be to keep a person's legs open for easy access to their genitals. It may be to keep their hands apart so they can not struggle as well. It may be to keep their thighs apart. It may be to keep their head and feet apart. There are many different positions you can force on a person using a spreader bar. All of the purposes though involve spreading two parts of the body apart. They are going to be spread the distance of the spreader bar. There are adjustable ones, but you cannot do this with wood. So when creating spreader bars, you might need to make multiple sizes. I personally have three separate sizes of spreader bars. But depending on what you wish to do, you might require more even. Now for some knowledge about why you might want a spreader bar, let's talk about how to make one.
So to make your very own spreader bar, you are going to need:
1. A 2 inch dowel
2. 60, 120, and 220 grit sandpaper
3. 2 eye bolts
To start, cut your dowel into the desired length of spreader bar you want. I think a 2 inch diameter dowel is a good size. You could go smaller, but you run the risk of the wood splitting when you insert the eye hook. If you want a stronger, bigger spreader bar, feel free to buy a larger dowel. The length of the spreader bar can be anywhere from 6 inches to 30 inches and some spreader bars even force people to do the splits and go up to 60 inches I believe.
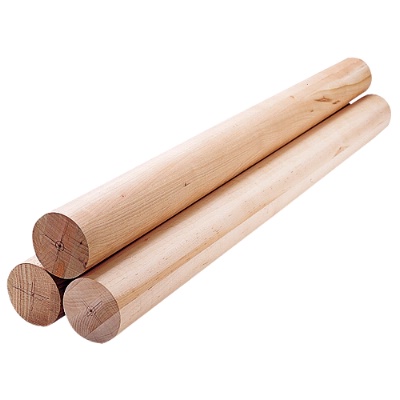
Here is what a dowel looks like:

You can use an electric saw to cut your dowel, but a hand saw also works quite well. There is not that much to saw through and a hand saw does not take long to use. You could also ask your home hardware store to cut it for you and they will for likely 50 cents to a dollar.
Now you need to sand down your dowel. Start with the 60 grit for any big imperfections, then use 120. You could then even use 220. I would only suggest this if you are not applying a varnish or paint coat though. The coat will be smooth with 220 and you do not really need to use 220 on the wood.
I used a polyurethane coat on my spreader bars, but you can really use any treatment for wood. If you want them to be a certain color use paint. So apply a layer of whatever you choose. Then sand it down with 220 grit until it is nice and smooth. And then repeat as many times as you need. I used 3 layers for a really nice finish. I think 2 normally works well too. I would not really recommend only using 1.
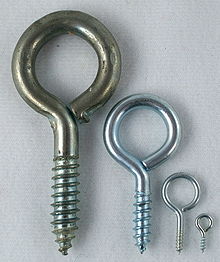
Now it is time to insert the eye hooks. Here is an image of an eye hook:

Choose a size that will allow you to clip onto, or lock onto. And choose the size you think looks best.
To insert the eye hooks, it is best to pre-drill a hole, but you do not need to. Take an electric drill with a 1/4 inch drill bit and drill a pilot hole. Your pilot hole must be smaller than your eye hook. It MUST NOT be larger or the eye hook will not stay properly. The purpose of a pilot hole is to help the eye hook go in straight and to prevent the wood from splitting.
Now you just need to insert the eye hooks. You just screw them in. This can be difficult by hand, so I used a screwdriver to help. I inserted it through the eye hook and used it as a handle to get more force and really tighten it.
And there you have it! Your very own spreader bar. You can make as many as you want in all varying sizes. You can make some for your feet, some for your hands, and some for your thighs, all at a very reasonable cost.
I personally got my dowel for 2 dollars and the eye hooks were 75 cents each. So my spreader bar was $3.50. Pretty cheap in my opinion.
Just a warning. You may see videos where spreader bars are used for suspension. This one CANNOT be used for suspension. An eye hook is not rated for that much force to be placed on it. You would need a different type of spreader bar.
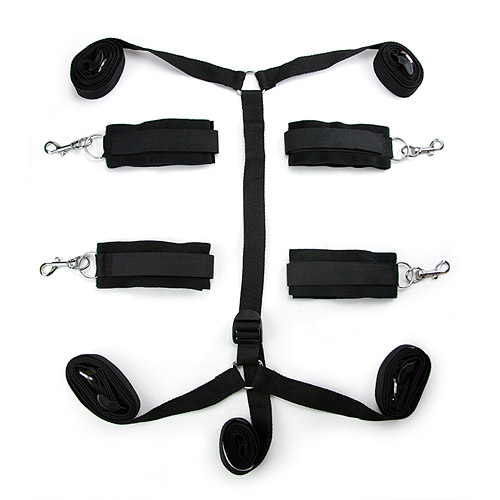
You can also put an eye hook in the middle of the spreader bar. You could use this to attach another spreader bar which could be attached to a collar. Or you can add additional hooks close to the ends so you can attach wrist and ankle cuffs. You can play around with the eye hooks however you want really.
So to make your very own spreader bar, you are going to need:
1. A 2 inch dowel
2. 60, 120, and 220 grit sandpaper
3. 2 eye bolts
To start, cut your dowel into the desired length of spreader bar you want. I think a 2 inch diameter dowel is a good size. You could go smaller, but you run the risk of the wood splitting when you insert the eye hook. If you want a stronger, bigger spreader bar, feel free to buy a larger dowel. The length of the spreader bar can be anywhere from 6 inches to 30 inches and some spreader bars even force people to do the splits and go up to 60 inches I believe.
Here is what a dowel looks like:

You can use an electric saw to cut your dowel, but a hand saw also works quite well. There is not that much to saw through and a hand saw does not take long to use. You could also ask your home hardware store to cut it for you and they will for likely 50 cents to a dollar.
Now you need to sand down your dowel. Start with the 60 grit for any big imperfections, then use 120. You could then even use 220. I would only suggest this if you are not applying a varnish or paint coat though. The coat will be smooth with 220 and you do not really need to use 220 on the wood.
I used a polyurethane coat on my spreader bars, but you can really use any treatment for wood. If you want them to be a certain color use paint. So apply a layer of whatever you choose. Then sand it down with 220 grit until it is nice and smooth. And then repeat as many times as you need. I used 3 layers for a really nice finish. I think 2 normally works well too. I would not really recommend only using 1.
Now it is time to insert the eye hooks. Here is an image of an eye hook:

Choose a size that will allow you to clip onto, or lock onto. And choose the size you think looks best.
To insert the eye hooks, it is best to pre-drill a hole, but you do not need to. Take an electric drill with a 1/4 inch drill bit and drill a pilot hole. Your pilot hole must be smaller than your eye hook. It MUST NOT be larger or the eye hook will not stay properly. The purpose of a pilot hole is to help the eye hook go in straight and to prevent the wood from splitting.
Now you just need to insert the eye hooks. You just screw them in. This can be difficult by hand, so I used a screwdriver to help. I inserted it through the eye hook and used it as a handle to get more force and really tighten it.
And there you have it! Your very own spreader bar. You can make as many as you want in all varying sizes. You can make some for your feet, some for your hands, and some for your thighs, all at a very reasonable cost.
I personally got my dowel for 2 dollars and the eye hooks were 75 cents each. So my spreader bar was $3.50. Pretty cheap in my opinion.
Just a warning. You may see videos where spreader bars are used for suspension. This one CANNOT be used for suspension. An eye hook is not rated for that much force to be placed on it. You would need a different type of spreader bar.
You can also put an eye hook in the middle of the spreader bar. You could use this to attach another spreader bar which could be attached to a collar. Or you can add additional hooks close to the ends so you can attach wrist and ankle cuffs. You can play around with the eye hooks however you want really.


awesome, thanks!